DIY Wedding Makeup: By some twist of fate, your wedding day is just around the corner and you find yourself contemplating whether to hire a professional makeup artist or take matters into your own hands.
Fear not, dear bride-to-be, for this comprehensive guide will equip you with the knowledge and skills needed to create your own stunning wedding makeup look.
From preparing your skin to choosing the right products, and from creating a flawless base to enhancing your features, we will walk you through each step of the process.
But that’s not all – we will also reveal the secret to adding those finishing touches that will make you feel like the radiant bride you’ve always dreamed of being.
So, let’s dive right in and discover the art of DIY wedding makeup!
Preparing Your Skin
To achieve a flawless and radiant complexion on your wedding day, it’s essential to properly prepare your skin. This begins with establishing a skincare routine that caters to your specific needs and concerns.
Start by cleansing your face twice daily with a gentle cleanser to remove dirt, oil, and makeup residue. Follow up with a toner to balance the pH levels of your skin and minimize the appearance of pores.
Next, apply a hydrating serum or moisturizer to nourish and protect your skin. Don’t forget to use a broad-spectrum sunscreen with at least SPF 30 to shield your skin from harmful UV rays.
If you have any makeup allergies, it’s crucial to identify and avoid any products that may trigger a reaction. Always read the ingredient list carefully and opt for hypoallergenic and fragrance-free formulas.
It’s also advisable to conduct patch tests before using any new products on your face. Apply a small amount on your inner arm and wait for 24 hours to see if any adverse reactions occur.
DIY Wedding Makeup: Choosing the Right Products
Choosing the right products for your wedding makeup is crucial to achieving a flawless and long-lasting look. Finding the perfect shades for your skin tone is the first step towards creating a stunning bridal look. When it comes to foundation, opt for a formula that provides medium to full coverage and has a long-wearing formula. Look for shades that match your skin tone perfectly, as this will ensure a seamless and natural finish.
For your eyes, choose eyeshadows that complement your eye color and enhance your natural features. Neutral shades like taupe, champagne, and bronze are versatile options that work well for most brides. If you want to add a pop of color, go for shades that complement your wedding theme or bouquet. Waterproof and long-wearing formulas are essential to prevent smudging and creasing throughout the day.
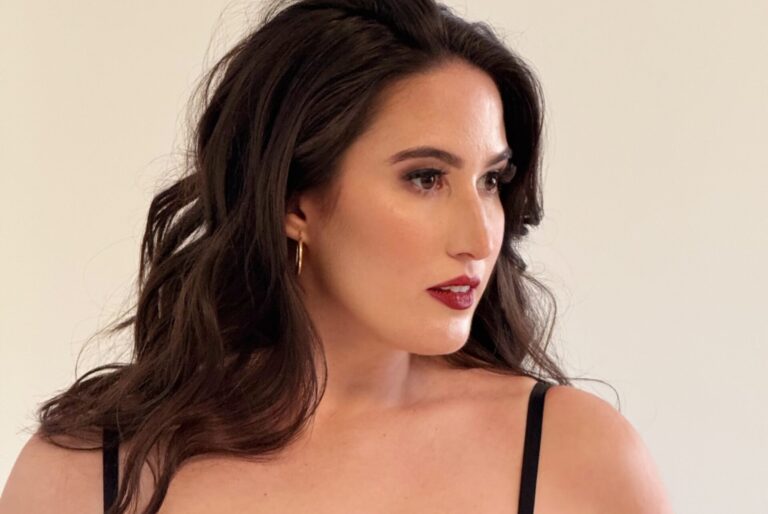
When it comes to lips, choose a lipstick or lip stain that offers long-lasting wear. Opt for shades that complement your skin tone and wedding theme. If you want your lipstick to stay put all day, consider applying a lip liner first to create a base and prevent feathering.
Remember to set your makeup with a setting spray to ensure it lasts throughout the day. Look for a formula that’s lightweight and enhances the longevity of your makeup.
DIY Wedding Makeup: Creating a Flawless Base

To create a flawless base for your wedding makeup, start with a primer that smooths and blurs imperfections while extending the wear of your foundation. A good primer is essential as it creates a smooth canvas for your foundation, helping it to last longer and preventing it from settling into fine lines and pores. Look for a primer that’s oil-free and has a silky texture for easy application.
Once you have applied your primer, it’s time to move on to color correction. Color correcting involves using specific shades to neutralize any discoloration on your skin. For example, if you have redness or blemishes, a green color corrector can help cancel out the red tones. Likewise, if you have dark under-eye circles, a peach or orange color corrector can counteract the bluish undertones.
When applying your foundation, it’s important to use the right blending techniques. Start by dotting the foundation onto your face and then use a damp beauty sponge or a foundation brush to blend it in. Make sure to blend it evenly, paying extra attention to areas that need more coverage. By using the right blending techniques, you can achieve a seamless and natural-looking base for your wedding makeup.
Enhancing Your Features
Now, let’s dive into techniques for accentuating your best features on your wedding day.
Highlighting techniques and contouring tips are essential for enhancing your natural beauty and creating a radiant bridal look.
When it comes to highlighting, the key is to use a light-reflecting product on areas where the light naturally hits your face. Start by applying a highlighter on the high points of your face, such as the cheekbones, brow bone, and down the bridge of your nose. This will give your skin a luminous and dewy glow, perfect for a bride.
Contouring, on the other hand, allows you to sculpt and define your facial features. Use a matte bronzer or contour powder to create shadows and add dimension. Apply it under your cheekbones, along the jawline, and on the sides of your nose to create the illusion of a slimmer face. Remember to blend well for a seamless finish.
To achieve a natural and flawless look, be sure to choose shades that complement your skin tone. Opt for a highlighter that matches your undertones and a contour shade that’s one or two shades darker than your natural skin color.
Adding the Finishing Touches
After perfecting your highlighting and contouring techniques, it’s time to add the finishing touches to complete your bridal makeup look. One crucial aspect to focus on is perfecting your lip color.
For a long-lasting and flawless pout, start by exfoliating your lips gently with a sugar scrub to remove any dryness or flakiness. Then, apply a lip balm to moisturize and prime your lips.
Choose a lip liner that matches your lipstick shade and carefully outline your lips, ensuring a defined and symmetrical shape. Fill in your lips with your chosen lipstick, using a lip brush for precise application. Blot your lips with a tissue and reapply another layer for an intense, saturated color.
To seal the deal, set your makeup for long-lasting wear. Use a setting spray to lock in your makeup and prevent it from smudging or fading throughout the day. Hold the bottle about 12 inches away from your face and mist it evenly. Allow it to dry naturally without touching your face.
With these finishing touches, your bridal makeup look will be complete, radiant, and ready to last all day and night.